
Okay, this is going to be a quick, down and dirty article in an effort to respond to a post on Facebook’s Liveaboard Sailboat group and it’s also Part 2 of the original article about not sinking my boat when…
This is a shot of my brand new, old-school, flax-packed stuffing box with my new prop shaft. As you can see, the locking bolt has been backed off and the packing nut has been backed off… 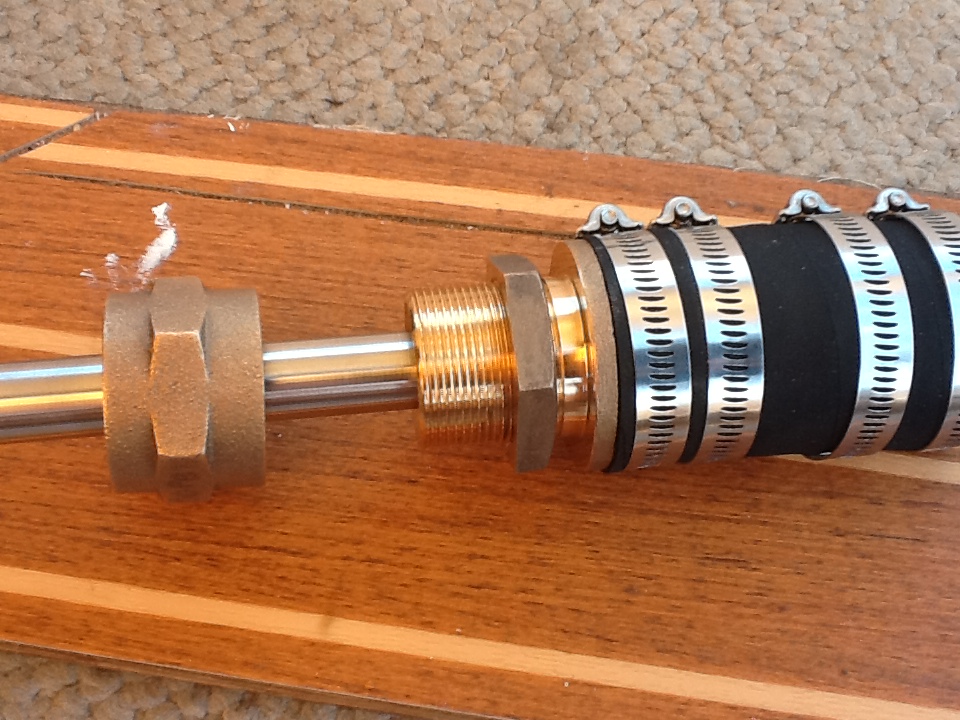
An inside view of the packing nut (I think that’s what it’s called). When the flax is inserted, and when screwed down onto the stuffing box, it compresses and makes a “water-tight’ seal. By “water-tight” I mean that it should keep the ocean out when the propeller shaft isn’t spinning (either by engine power or by the flow of water making the propeller rotate while sailing and the engine is in neutral, et cetera). When is use, there should be a few drips of water. THIS IS NORMAL and a required part of it’s function — if it is packed with simply flax. The water is needed to both lubricate and cool the seal.
Here is a photo of the flax cut to length, which is the radius of the shaft. Going traditional, you would cut three or four of these to length and line them up so that their ends do not line up.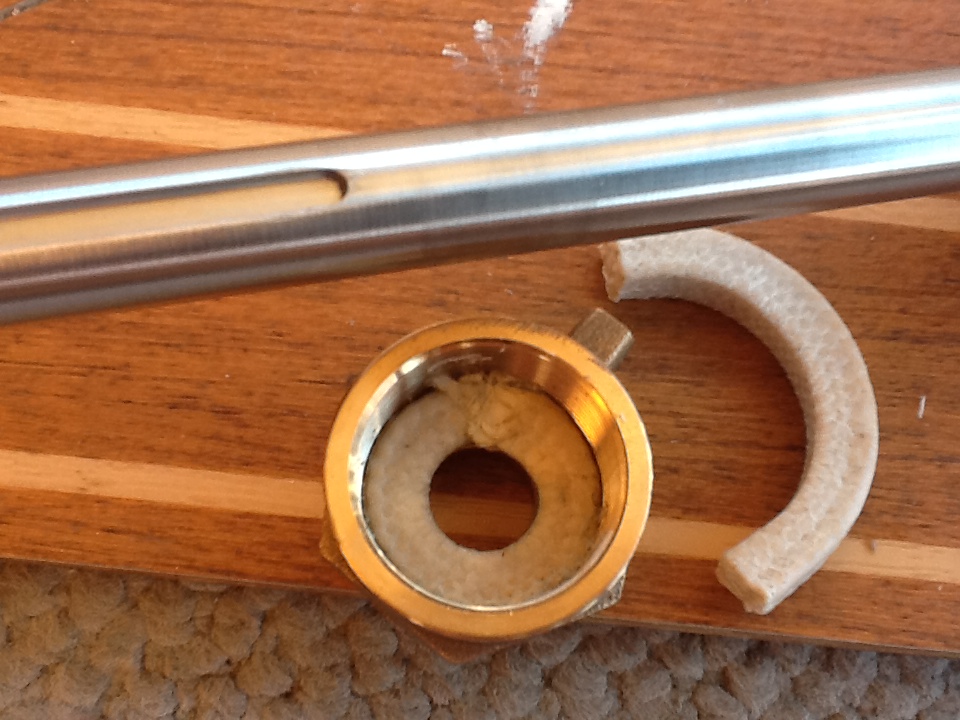
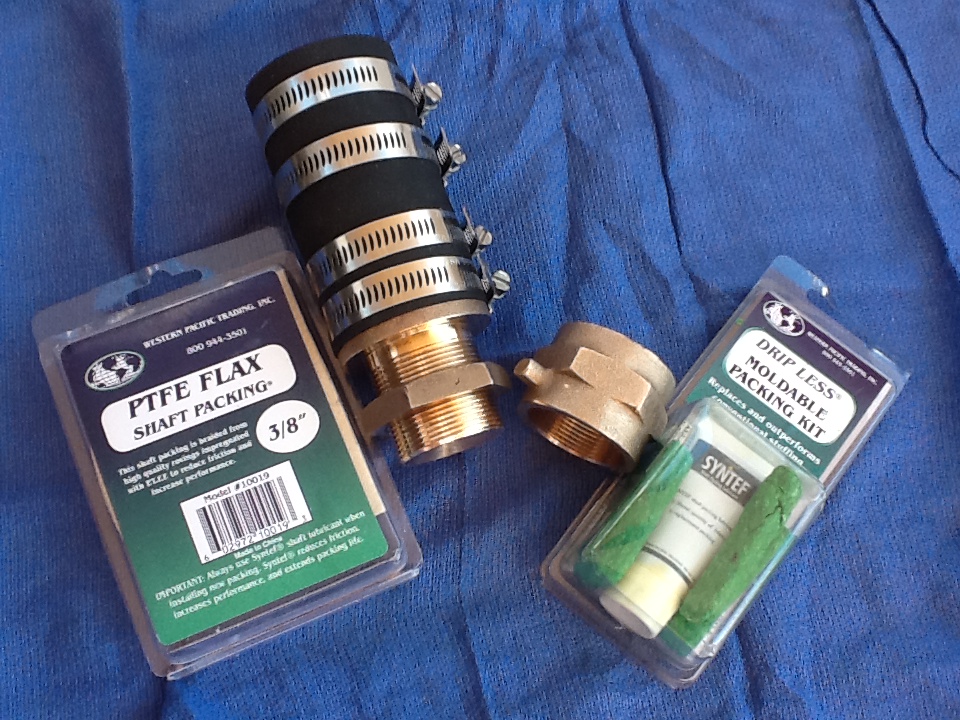
For Sine Metu, I wanted a dryer bilge area and went with the Drip Less Moldable Packing Kit as shown. This green putty needs to be sandwiched between layers of old-school flax, and there is a special kind of grease that also gets added to the mix. Make sure you read the directions!
This shot doesn’t show the final strand of flax…which I forgot to add and thus, had to remove a little of the Drip Less packing to make room for. Again, read directions!
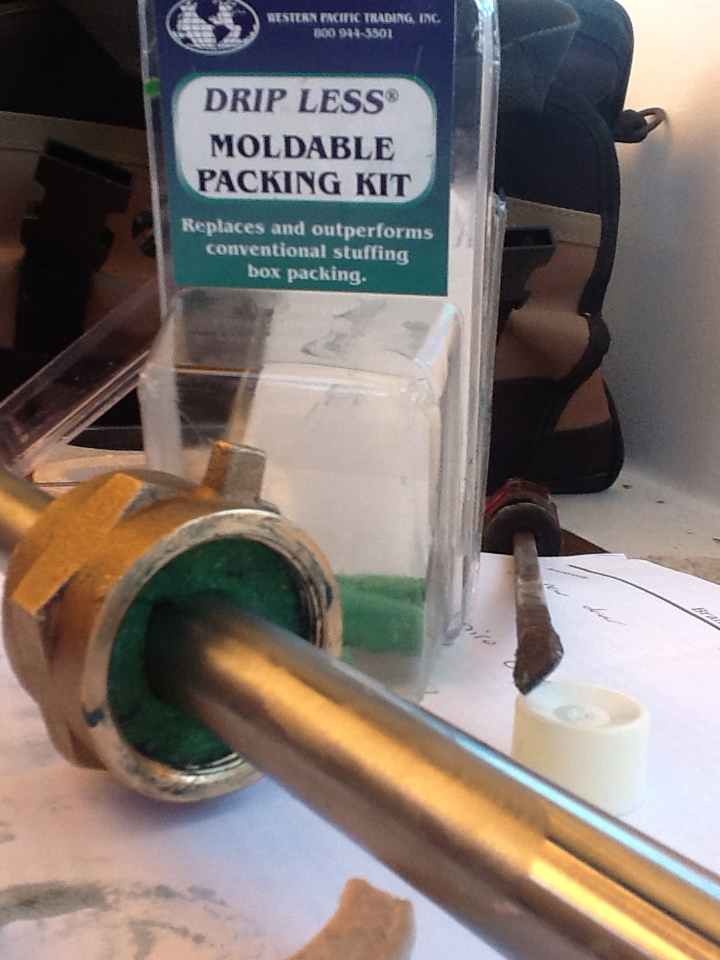
Here is the packing nut all filled up and ready to go! A little trick I learned was to screw it on down and compress the packing material, remove it once more and then I was able to add more Drip Less packing material between the layers of flax. Obviously, as I was doing this in the comfort of my cockpit and not contorted over and around the engine, this is a best case example. But, with my 52 pound electric drive, I would have certainly removed the dozen odd bolts and pulled the engine anyway. 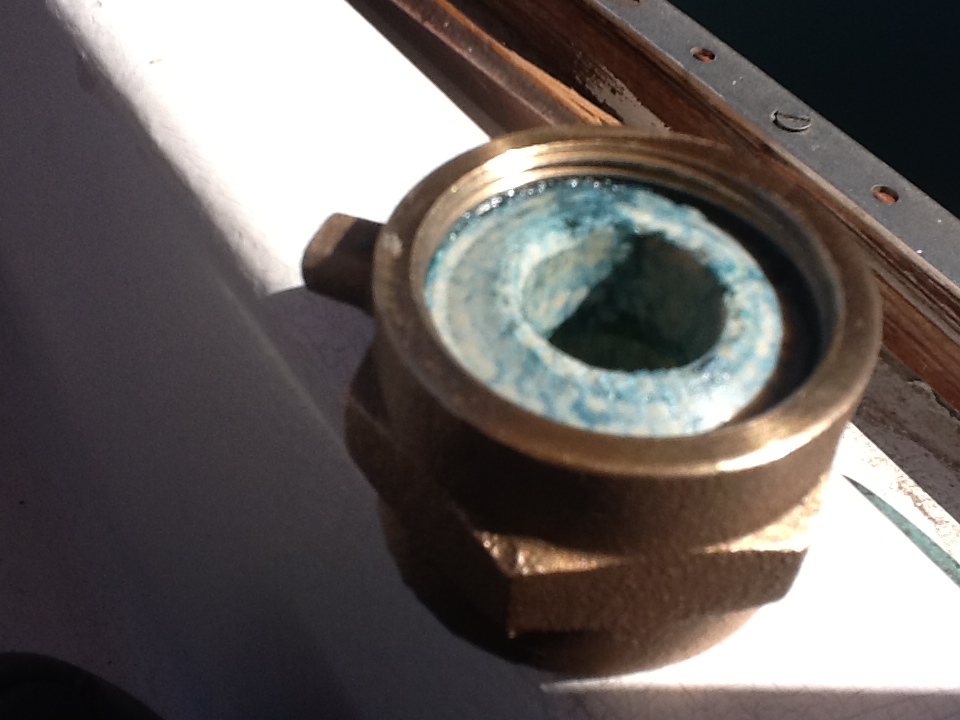
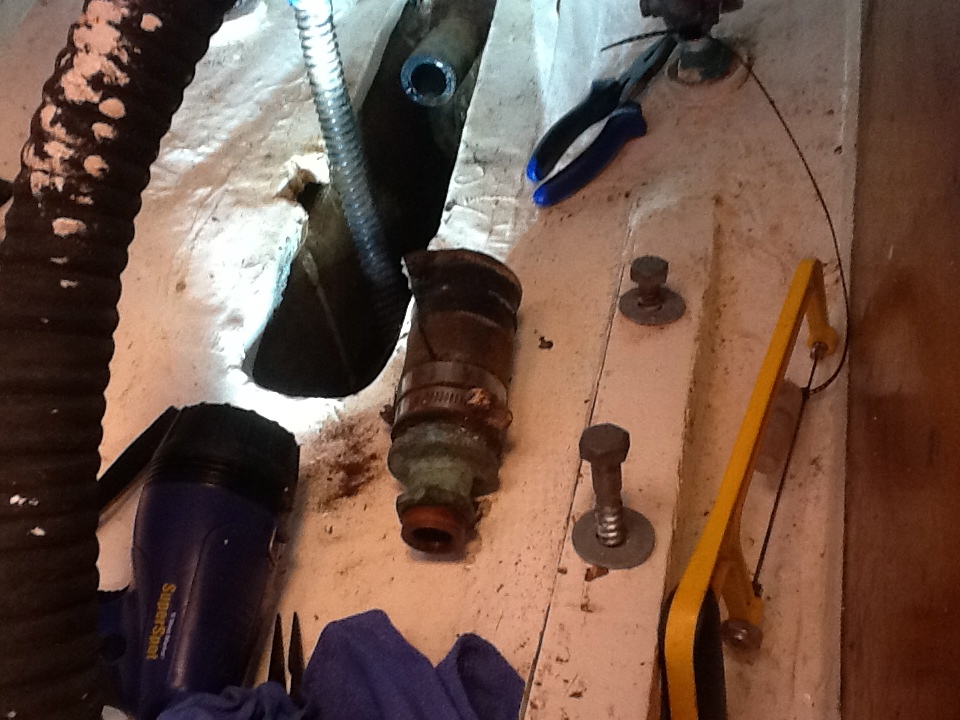
Keep in mind that my boat was in the water when I did this. It’s really easy with the shaft removed and a soft wood plug tapped into the underwater cutless bearing. And as you can see, there isnt a drop of water flowing in.
For what it’s worth, that’s the original, 50 year old stuffing box, which I had to use a hacksaw to split open to remove.
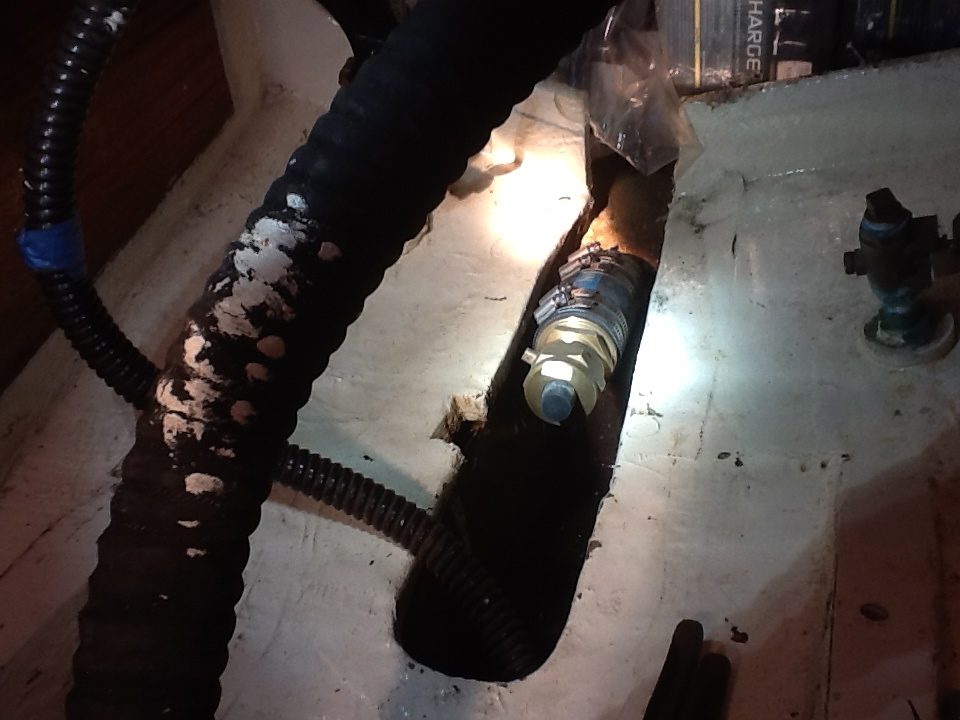
Here is the brand new stuff in box in place. Fabio of WEST COAST DIVING SERVICES was coming by the next day to help me install the propeller shaft and prop. Everything went great and, well, you’ll have to wait and read about the eDrive’s performance with the new prop!
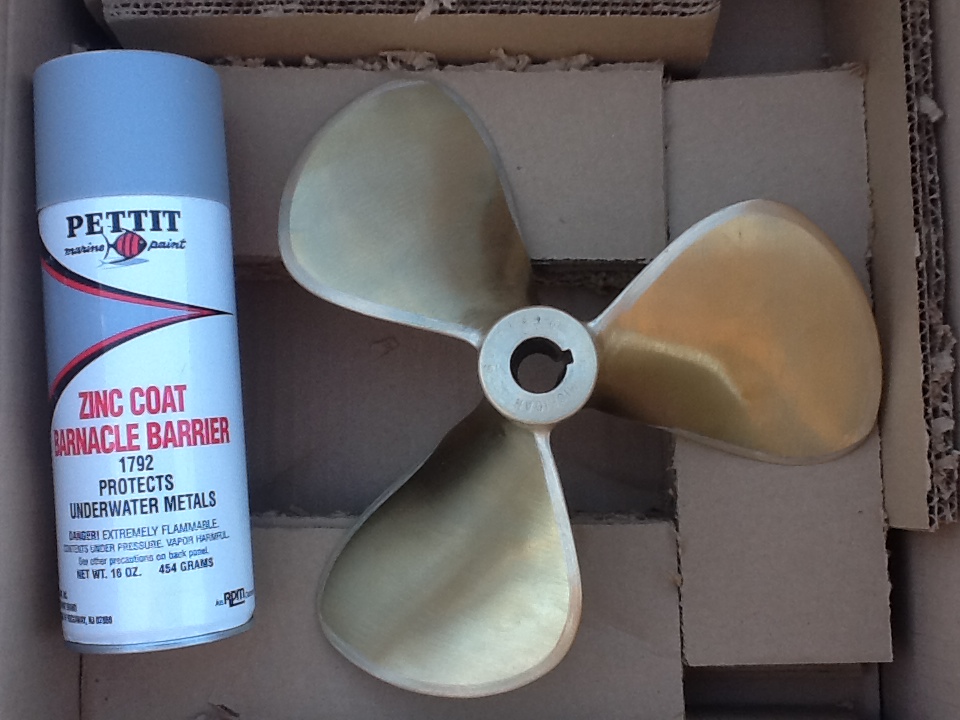
Speaking of which, this is the new, over pitched prop from Deep Blue Yacht Supply, Inc.; a MP33B10B: 10 x 12 Bronze with 3/4 Bore, RH Rotation and No Cupping. This is the “before’ photo. I applied three coats of Petit Zinc Coat Barnacle Barrier as it works great over here in Southern California and Mexican waters.
The “after” photo of the prop, along with the shaft’s zinc and bolts, key and cotter pin.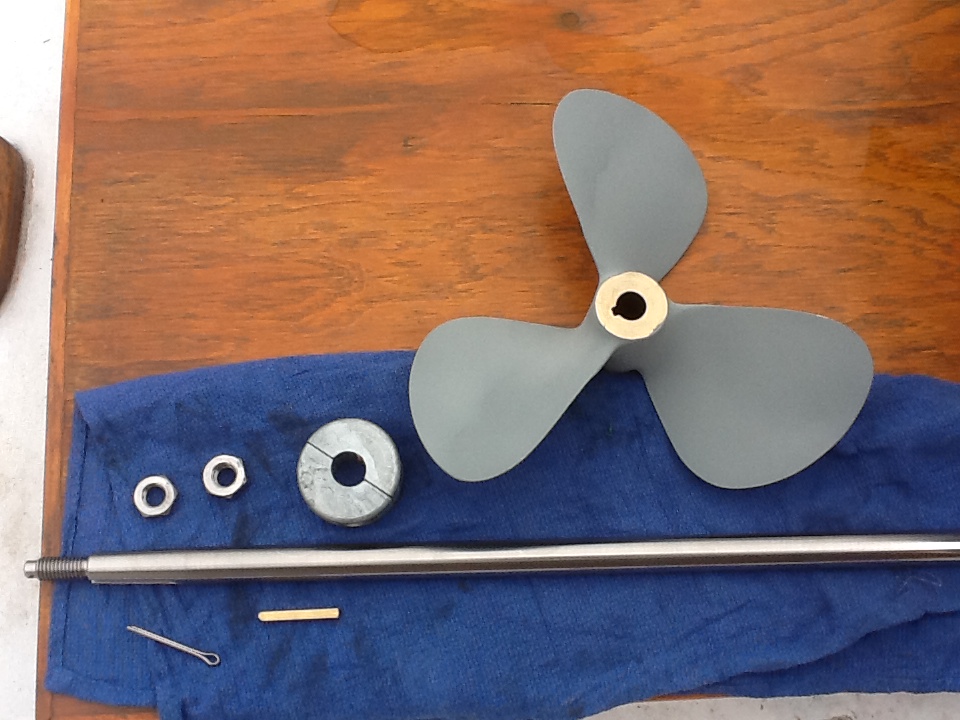
So, there you have it, a successful in-the-water shaft and stuffing box replacement. All in all, a little less than a gallon of water came in during the entire process, but I was prepared for a worst-case events with two electric bilge pumps freshly tested and ready to go, a manual, gallon-per-stroke monster in the cockpit and I had confirmed that the dock master had their massive, heavy-duty pump at the ready. Better to be prepared than to be blowing bubbles!
