Tags
In a hole in the ground there lived a hobbit. Not a nasty, dirty, wet hole, filled with the ends of worms and an oozy smell, nor yet a dry, bare, sandy hole with nothing in it to sit down on or to eat: it was a hobbit-hole, and that means comfort.” J.R.R.Tolkien – The Hobbit
If chance favors, and an invitation to come aboard Sine Metu is gladly offered, then a trip down into my cozy cabin would mean that a first impression is about to be experienced. When you first view my little 1963 Columbia 24’s interior, it should be a surprise, a pleasant surprise, I hope. But, when I first bought her for $800, that experience could only be seen through my eyes: Covered in a mosaic of glued-down, beige vinyl tiles from the late ‘70s or early ‘80s, and covered again with a cheap blue carpet and covered still yet again by a beige throw rug, too! Thankfully, I don’t have any photos of that visual cacophony, but this is what it looked like when I ripped all of that out and threw it away as fast as I could.
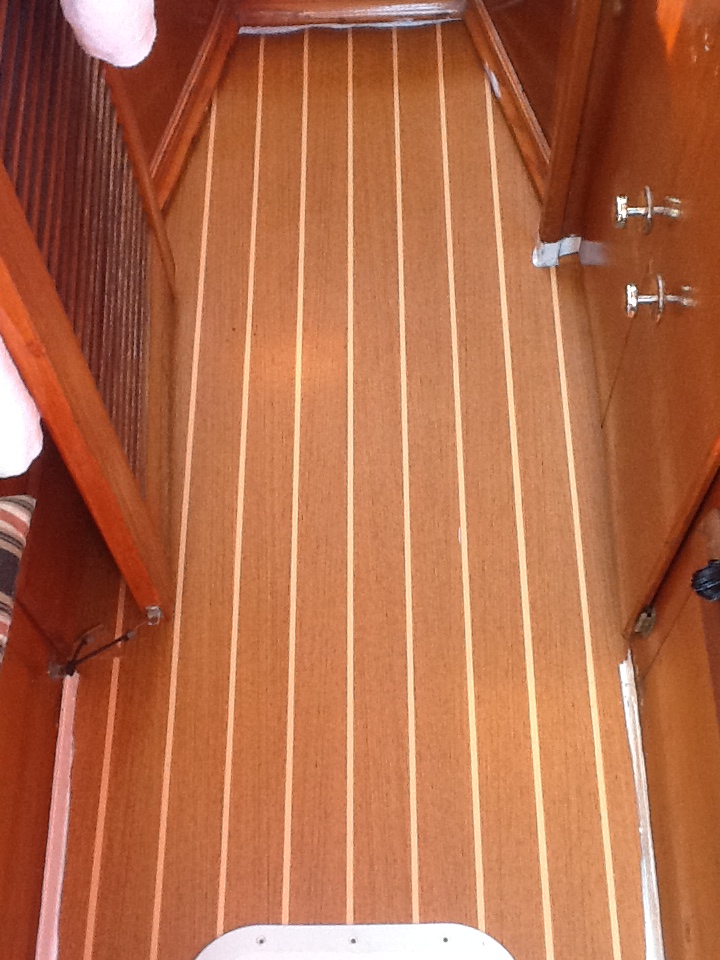
 In my mind’s eye, this is what I envisioned the cabin sole should and determined to look like (click on the photo for a link to Defender.com):
It was an expensive investment as I had to buy a 7-foot long section to get the length I wanted, but as they only sell it with a width-wise pattern 6-foot wide, I have a lot left over to this day. So, out of 42 square feet bought, I only used 15.75 sqf. The rest I am thinking of using in other locations, including on deck and exposed to direct sunlight and weather. I did have a large piece covering the top of the old foredeck hatch for about a year, and it held up without issue, but in the lifetime of a 53-year old sailboat, that was just long enough to cut my teeth on the idea.
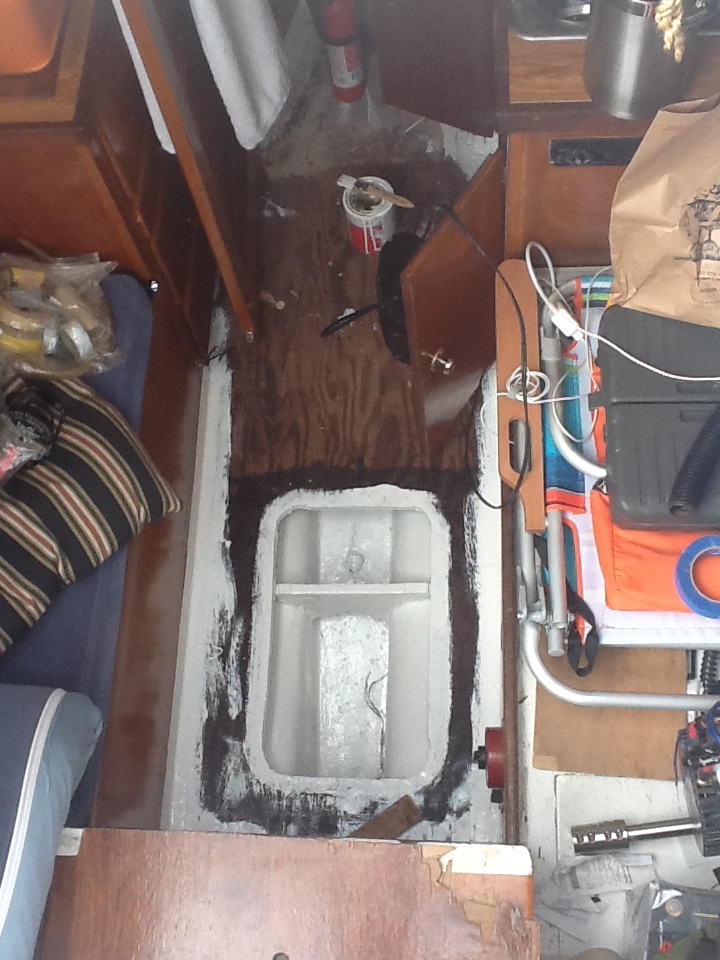 So, with Stephen Covey’s second habit in mind, I went about rebuilding the cabin’s sole — which was appropriate as I’ve been rebuilding the sailboat from the keel up since buying her. The first thing I did was to rebuild the cabin sole’s foundation and to widen the bilge access for a new hatch. The original lip being dry rotted, wobbly and unable to be secured down. Cutting along its circumference, about an inch in, revealed good, solid, wood, which I then heated with an electric cabin heater and applied epoxy resin. A friend told me that, as the wood cooled, capillary action would absorb and draw the epoxy deeply into the wood’s grain. Which, it eagerly did! I then went about drilling small holes just into, but not through the sole, and applied the same alchemy to the rest of the cabin floor.
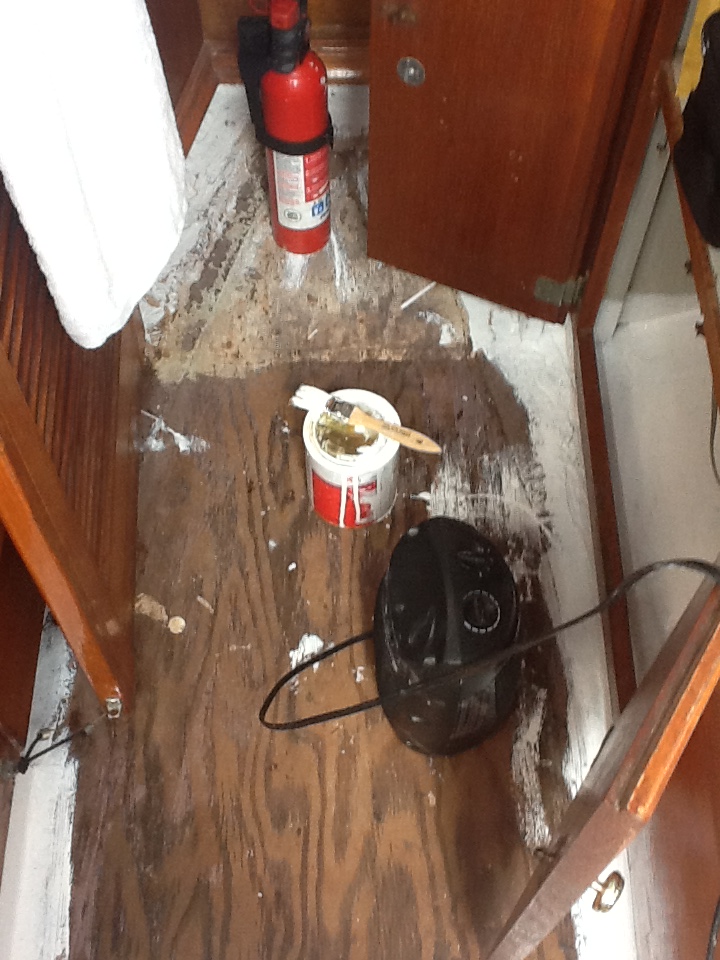 A couple of days after the epoxy had dried I painted the bilge, the empty engine compartment and along the cabin’s edges (to cover up the old paint that was there). I also painted inside of the lockers.
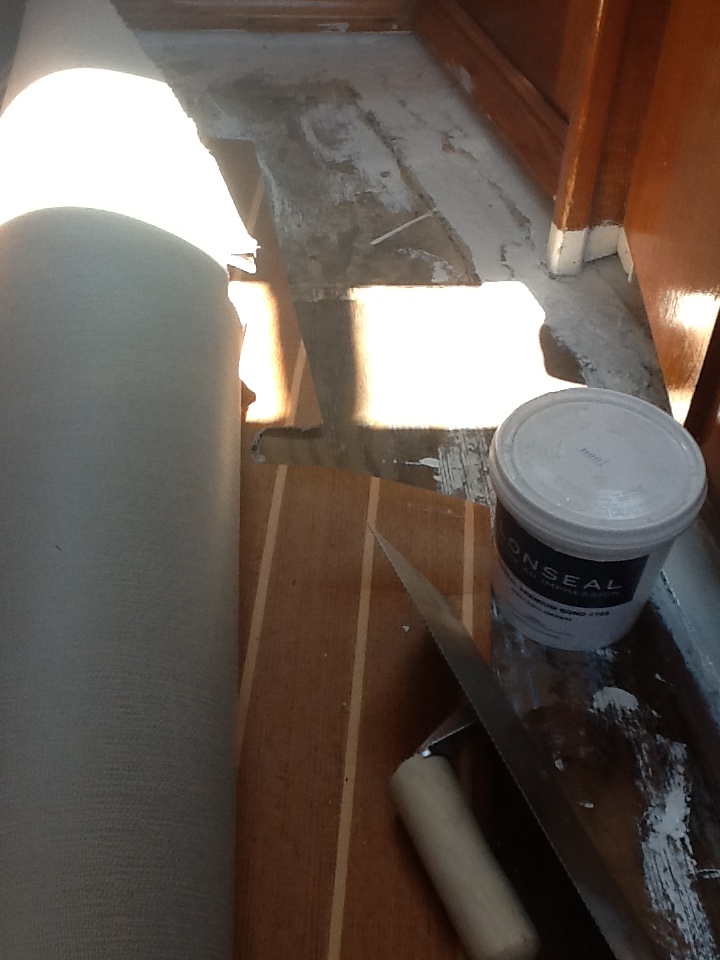
It was then time to cut a template of the sole, which was kind of fun I have to admit. Lots of brown paper, a straight edge, scissors, a razor, tape, and a Sharpie to scribble all sorts of notes.
Next, I unrolled the Lonseal on the dock and carefully lined the template up knowing that if I got the angles wrong, the teak and holly pattern would be skewed off to one side or the other and not be parallel with the rest of the cabin. Not wanting to go for a psychedelic experience, I spent a significant amount of time getting the pattern lined up as perfectly as possible. Finally satisfied, I installed a brand new razor blade in the box knife and commenced to committing myself to the task.
Satisfied with my tailoring, I dry fitted the flooring and trimmed off some of the extra material I left along an edge or three.
Finally, it was time to apply the Lonseal adhesive to the floor. I did the port side first with the material rolled width-wise. Working from the middle to the far side, I troweled on the adhesive, making sure to use the proper grooves so as to spread the glue thoroughly and evenly. Then, after letting it rest for the appropriate amount of time, as per the instructions (yes, I do read those from time to time), I slowly unrolled it and wiggled it into place. I then repeated the process and did the starboard side.
 I then covered the floor with a multitude of hardcover books and other weights to press it down. I wish I had a picture of that process because it amused me to no end to see all of those James Patterson, Stephen King, Robert Ludlum, Dean Koontz, John Grisham, Clive Cussler, Ian Fleming, and Tom Clancy books radiating out from a centerpiece of J.R.R.Tolkien and Henry David Thoreau. “Did I do that by accident?” I had to ask myself as I sipped some well deserved single malt whisky. A Glenmorangie port wood, now called the Quinta Ruban, if I recall.
In the end, I’m proud to show off Sine Metu’s interior as I think even a Hobbit would feel comfortable having a bite to eat and relaxing in the main cabin. Yes, it’s a small cabin, but it’s my cabin.
My dwelling was small, and I could hardly entertain an echo in it; but it seemed larger for being a single apartment and remote from neighbors.” Henry David Thoreau – Walden.